

If you can blink an LED on an ESP32, you can build this sensor. An ESP32 Home Assistant ESPHome setup turns that board into a room sensor for temperature and humidity. It shows readings on your phone, keeps a history, and can trigger an automation, with no cloud account and no Arduino code.
TL;DR: ESP32 Home Assistant ESPHome in one minute
Install Home Assistant, then install ESPHome Device Builder from the App Store. Create a device named living room sensor, pick ESP32, and wire a DHT22 sensor to GPIO 4. Add a short YAML config, flash the board once over USB, and Home Assistant finds it on its own. Finally, add two dashboard cards, and later updates happen over WiFi.
What is Home Assistant
Home Assistant is free and open source software that runs on a small computer in your home. It is one control centre for smart devices of any brand. It started on 17 Sep 2013, and it is now owned by the Open Home Foundation, a non profit.
What is ESPHome
ESPHome is a free and open source firmware framework that turns a cheap ESP32 or ESP8266 board into a Home Assistant device. First, you describe the hardware in a short YAML file. ESPHome turns that description into firmware, and the board connects over its native API, an encrypted local connection, with no MQTT broker needed.
ESP32 Home Assistant ESPHome, why this combination works
This sensor is cheap, local, and easy to change. An ESP32 board costs about 5 to 10 dollars, and a DHT22 sensor costs about 4 dollars, so the build is about 10 to 15 dollars. By comparison, a similar commercial sensor often costs 25 to 60 dollars, and many send your data to a vendor cloud.
What you need for this ESP32 Home Assistant ESPHome project
You need a running Home Assistant setup, an ESP32 board, a DHT22 or DHT11 sensor, a USB data cable, a breadboard and jumper wires, a computer with a browser, and a 2.4 GHz WiFi network. For board help, read our guide here: https://techknowlogy.net/best-esp32-board-2026/ However, ESP32 boards use 2.4 GHz WiFi, so a 5 GHz only network will not work.
DHT11 or DHT22, which sensor should you pick
| Sensor | Temperature range | Temperature accuracy | Humidity range | Humidity accuracy | Typical price |
|---|---|---|---|---|---|
| DHT11 | 0 to 50 degrees Celsius | About plus or minus 2 degrees | 20 to 90 percent | About plus or minus 5 percent | About 2 dollars |
| DHT22 | Minus 40 to 80 degrees Celsius | About plus or minus 0.5 degrees | 0 to 100 percent | About plus or minus 2 to 5 percent | About 4 dollars |
Step 1: Get Home Assistant running
If Home Assistant is already running, skip this step. If it is not, install Home Assistant Operating System on a Raspberry Pi, on Home Assistant Green, or on an x86 computer you already own.
Next, download the image from the official installation page, flash it, boot the hardware, then open http://homeassistant.local:8123 and finish the setup wizard.
Step 2: Install ESPHome Device Builder
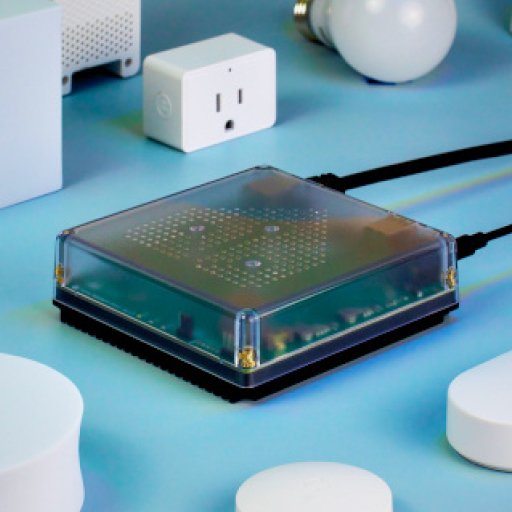
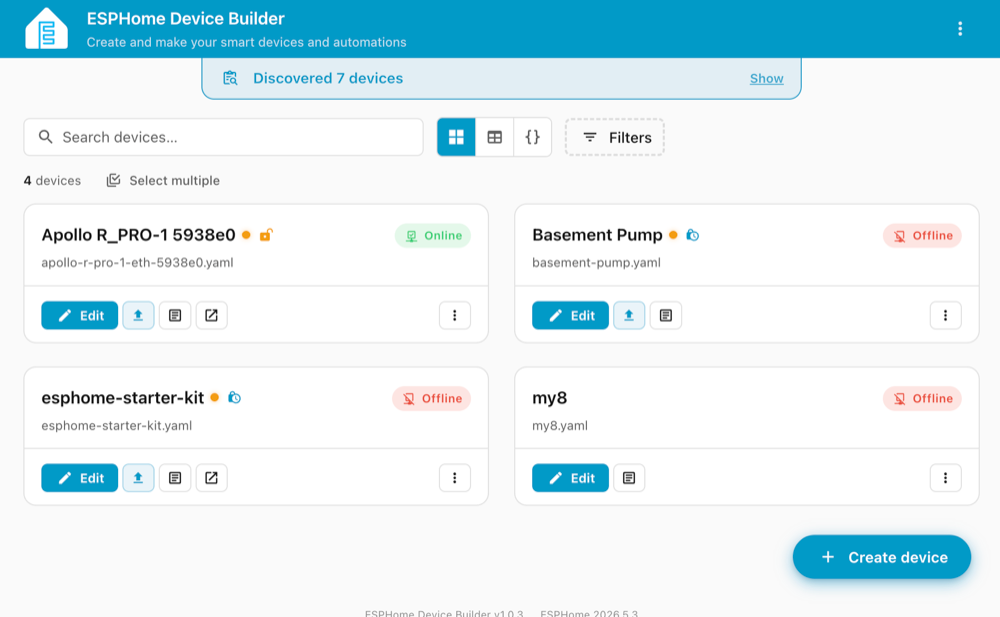
Open Home Assistant, go to Settings, then Apps, then App Store. In older versions the same screen is called Settings, Add ons, Add on Store. Search for ESPHome, pick the official ESPHome Device Builder, and click Install. Wait a minute or two, click Start, and open it from the sidebar. You should now see the device list, with a button to add a new device.
Step 3: Create your first ESP32 Home Assistant ESPHome device
In ESPHome Device Builder, click New Device. Give it a clear name, with underscores and no spaces, for example living_room_sensor. Pick ESP32 as the board type, and pick the board model that matches your hardware, for example esp32dev for a classic ESP32 DevKit board. Then, enter your WiFi name and password, and let ESPHome generate a base config. Save the device, but do not flash it yet. Wire the sensor first, so the first flash already has a working sensor to read.
Step 4: Wire the DHT22 sensor to your ESP32
Wire the sensor with the power off. Connect DHT22 VCC to the 3.3 volt pin, DHT22 GND to a GND pin, and DHT22 DATA to GPIO 4. If you use a bare sensor with four pins, the third pin is not connected, so leave it empty.
In addition, many modules already have a pull up resistor built in. If you use a bare sensor, add a 4.7k ohm to 10k ohm resistor between the DATA pin and the 3.3 volt rail. Double check the wiring before you plug in the USB cable, because 5 volts on the data line can damage an ESP32 GPIO pin. If you built your first ESP32 project already, this wiring will feel familiar. Read it here: https://techknowlogy.net/your-first-esp32-project-blinking-an-led-complete-tutorial/
Step 5: Write the ESPHome config, explained part by part
Open your device in ESPHome Device Builder and click Edit. YAML is a plain text format where spaces and indents matter, so copy each part carefully. The config below is an outline, not a full file to paste blindly.
First, the device name.
esphome:
  name: living_room_sensor
  friendly_name: Living Room Sensor
Second, the board.
esp32:
  board: esp32dev
Third, WiFi.
wifi:
  ssid: YOUR_WIFI_NAME
  password: YOUR_WIFI_PASSWORD
Fourth, the Home Assistant API, with encryption. ESPHome Device Builder generates the encryption key for you, so copy the key it shows and do not share it.
api:
  encryption:
    key: YOUR_API_KEY
Fifth, the sensor. It says the sensor is a DHT sensor on GPIO 4, the model is DHT22, and it should create two readings, temperature and humidity, every 60 seconds.
sensor:
  - platform: dht
    pin: GPIO4
    model: DHT22
    temperature:
      name: Living Room Temperature
    humidity:
      name: Living Room Humidity
    update_interval: 60s
The official ESPHome sensor docs list the same platform, pin, model, temperature, humidity, and update interval keys. Read the official sensor docs here: https://next.esphome.io/components/sensor/
Step 6: Flash the board, first over USB, then over WiFi
The first flash needs a USB cable. Plug the ESP32 into your computer with a USB data cable, not a charge only cable, and click Install in ESPHome Device Builder. Pick Plug into this computer, pick the serial port, and wait while ESPHome compiles and flashes the firmware. The first compile takes a few minutes. If you see an upload error, the same checks from our Arduino IDE guide apply. Read it here: https://techknowlogy.net/arduino-ide-setup-for-esp32-2026/
Step 7: Add the device to Home Assistant
Home Assistant should find your new device on its own within a minute or two. Go to Settings, then Devices and Services, and look for ESPHome under Discovered. Click Add, confirm the device, and enter the API encryption key if Home Assistant asks for it.
Otherwise, if the device does not appear, add it by hand. In Settings, then Devices and Services, click Add Integration, choose ESPHome, and enter the IP address of your ESP32 board, with the port left at 6053. Find the IP address in your router admin page, or in the ESPHome Device Builder logs.
Once added, open the device page. You should see Living Room Temperature and Living Room Humidity, with live readings that update every 60 seconds. If both show Unknown, check the wiring, the pull up resistor, and the model name, then wait 60 seconds and check again.
Step 8: Build a dashboard card for your ESP32 Home Assistant ESPHome sensor
Open your dashboard, click Edit Dashboard, then Add Card. Pick a Gauge card for temperature, and pick the Living Room Temperature entity. Then, add a second Gauge card for humidity, and pick the Living Room Humidity entity. Save the dashboard, then click Done.
Step 9: Add your first automation
Go to Settings, then Automations and Scenes, then Create Automation. Set the trigger to Numeric state, pick Living Room Temperature, and set Above to 28 degrees. Set the action to Send a notification, pick your phone from the Home Assistant Companion App, and write a short message, for example Living room is above 28 degrees. Save the automation, then test it by warming the sensor gently, or by lowering the trigger to just above the current room temperature. For Blynk alerts instead, read our Blynk guide here: https://techknowlogy.net/blynk-iot-esp32-dht11-alerts/
Cost, free and paid limits
Home Assistant is free, and ESPHome is free. There is no device limit in Home Assistant itself, and no monthly message limit for a local ESPHome sensor, unlike a cloud service such as Blynk, which limits free accounts to 100,000 messages a month. In total, your only costs are the hardware, about 10 to 15 dollars, and the electricity to run Home Assistant.
Troubleshooting your ESP32 Home Assistant ESPHome sensor
If the first flash fails, check the USB cable first, then the board and port. If readings jump around, move the sensor away from the board, because the board warms up while it runs.
FAQs about ESP32 Home Assistant ESPHome
Do I need Home Assistant Cloud for this project
No. Home Assistant and ESPHome both run locally, and the sensor works without any cloud account. Home Assistant Link is optional, and it only adds easy remote access and voice services.
Do I need Arduino IDE for ESPHome
No. ESPHome replaces the Arduino IDE workflow for this project. You write YAML, ESPHome compiles the firmware, and you flash it from the Device Builder. You can still use Arduino IDE for other ESP32 projects.
Can I use a DHT11 instead of a DHT22
Yes. Wire it the same way, on GPIO 4, and change only the model line in the YAML file from DHT22 to DHT11. Expect less accuracy, a narrower range, and readings that change in whole degrees, not tenths of a degree.
Can ESPHome work without Home Assistant
Yes. ESPHome devices can run on their own, and you can build local automations directly on the device. Home Assistant adds the dashboard, the history, and the easy automations, so most people use both together.
How often should the sensor send readings
Once every 60 seconds is a good start for a room sensor. The DHT22 should not be read more often than once every 2 seconds, and the DHT11 should not be read more often than once every second.
The bottom line on ESP32 Home Assistant ESPHome
An ESP32 Home Assistant ESPHome sensor is the best first smart home build for most beginners. Overall, it costs about 10 to 15 dollars, it needs one board, one sensor, and a few wires, and it teaches the whole workflow, from YAML to flashing to dashboards to automations, in one afternoon.