Introduction
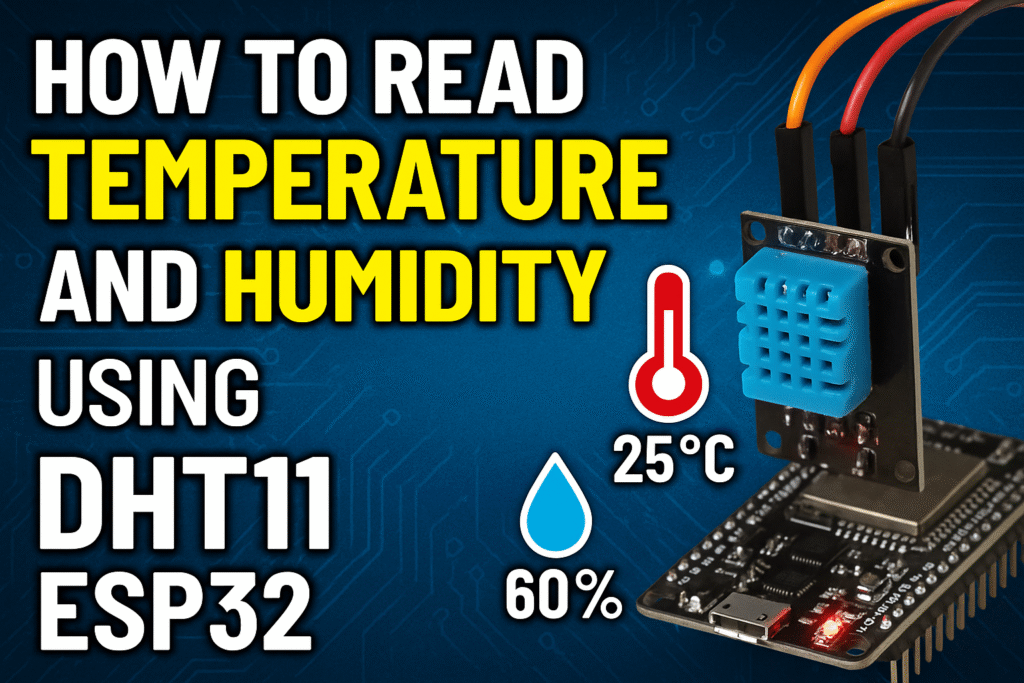
The DHT11 sensor combined with the ESP32 microcontroller creates a powerful and affordable solution for monitoring environmental conditions. Moreover, whether you’re building a smart home system, weather station, or IoT project, learning to interface the DHT11 with ESP32 is an essential skill for any maker or developer.
In this comprehensive guide, you’ll learn everything you need to know about reading temperature and humidity data using the DHT11 sensor with ESP32, including wiring, programming, troubleshooting, and practical applications.
What is DHT11 Sensor?
The DHT11 is a basic, low-cost digital temperature and humidity sensor. Specifically, it uses a capacitive humidity sensor and a thermistor to measure the surrounding air and then outputs a digital signal on the data pin.

DHT11 Specifications
- Temperature Range: 0-50°C (±2°C accuracy)
- Humidity Range: 20-90% RH (±5% accuracy)
- Operating Voltage: 3.3V to 5V
- Sampling Rate: 1 Hz (one reading per second)
- Interface: Single-wire digital interface
- Cost: Affordable with compact form factor
DHT11 Pinout
The DHT11 sensor typically comes in two formats:
- 4-pin module: VCC, Data, NC (Not Connected), GND
- 3-pin module: VCC, Data, GND (with built-in pull-up resistor)
Why Use ESP32 with DHT11?
The ESP32 is an excellent choice for DHT11-based projects due to several advantages:
- Built-in WiFi and Bluetooth: Send sensor data to cloud platforms or mobile apps
- Low power consumption: Ideal for battery-powered applications
- Multiple GPIO pins: Connect multiple sensors simultaneously
- Powerful processor: Handle complex calculations and data processing
- Arduino IDE compatible: Easy programming with extensive library support
- Cost-effective: Affordable for hobbyists and commercial projects
Components Required
To complete this project, you’ll need:
- ESP32 development board (any variant)
- DHT11 temperature and humidity sensor
- Breadboard
- Jumper wires (male-to-male and male-to-female)
- 10kΩ resistor (if using 4-pin DHT11 without built-in pull-up)
- USB cable for programming
- Computer with Arduino IDE installed
Circuit Diagram and Wiring
Wiring the DHT11 to ESP32
The connection is straightforward.
First, for the 3-pin DHT11 module:
- VCC → 3.3V (or 5V) on ESP32
- Data → GPIO pin (e.g., GPIO 4)
- GND → GND on ESP32
Alternatively, for the 4-pin DHT11 sensor:
- Pin 1 (VCC) → 3.3V on ESP32
- Pin 2 (Data) → GPIO 4 on ESP32
- Pin 3 (NC) → Leave unconnected
- Pin 4 (GND) → GND on ESP32
- Add a 10kΩ pull-up resistor between VCC and Data pin
Note: GPIO 4 is used in this example, but you can use any available GPIO pin on your ESP32.
Setting Up Arduino IDE for ESP32
Before programming, ensure your Arduino IDE is configured for ESP32:
Step 1: Install ESP32 Board Support
- Open Arduino IDE
- Go to File → Preferences
- In “Additional Board Manager URLs,” add:
https://raw.githubusercontent.com/espressif/arduino-esp32/gh-pages/package_esp32_index.json - Click OK
- Go to Tools → Board → Boards Manager
- Search for “ESP32” and install “ESP32 by Espressif Systems”
Step 2: Install DHT Sensor Library
- Go to Sketch → Include Library → Manage Libraries
- Next, search for “DHT sensor library” by Adafruit
- Then install “DHT sensor library by Adafruit”
- Additionally, install “Adafruit Unified Sensor” library when prompted
Step 3: Select Your ESP32 Board
- Go to Tools → Board
- Select your ESP32 board model (e.g., “ESP32 Dev Module”)
- Select the correct COM port under Tools → Port
Programming ESP32 to Read DHT11 Data
Here’s a complete Arduino sketch to read temperature and humidity from the DHT11 sensor:
#include <DHT.h>

// Define DHT sensor type and pin
#define DHTPIN 4          // GPIO pin connected to DHT11 data pin
#define DHTTYPE DHT11     // DHT11 sensor type

// Initialize DHT sensor
DHT dht(DHTPIN, DHTTYPE);

void setup() {
  // Initialize serial communication
  Serial.begin(115200);
  Serial.println("DHT11 Sensor Test with ESP32");

  // Initialize DHT sensor
  dht.begin();

  // Wait for sensor to stabilize
  delay(2000);
}

void loop() {
  // Wait between measurements (DHT11 sampling rate is 1Hz)
  delay(2000);

  // Read humidity
  float humidity = dht.readHumidity();

  // Read temperature in Celsius
  float temperatureC = dht.readTemperature();

  // Read temperature in Fahrenheit
  float temperatureF = dht.readTemperature(true);

  // Check if readings failed
  if (isnan(humidity) || isnan(temperatureC) || isnan(temperatureF)) {
    Serial.println("Failed to read from DHT sensor!");
    return;
  }

  // Calculate heat index in Celsius
  float heatIndexC = dht.computeHeatIndex(temperatureC, humidity, false);

  // Calculate heat index in Fahrenheit
  float heatIndexF = dht.computeHeatIndex(temperatureF, humidity);

  // Display readings on Serial Monitor
  Serial.println("---------------------------");
  Serial.print("Humidity: ");
  Serial.print(humidity);
  Serial.println(" %");

  Serial.print("Temperature: ");
  Serial.print(temperatureC);
  Serial.print(" °C / ");
  Serial.print(temperatureF);
  Serial.println(" °F");

  Serial.print("Heat Index: ");
  Serial.print(heatIndexC);
  Serial.print(" °C / ");
  Serial.print(heatIndexF);
  Serial.println(" °F");
  Serial.println("---------------------------");
}
Code Explanation
Library Inclusion: The DHT.h library provides functions to communicate with DHT sensors easily.
Pin Configuration: Subsequently, GPIO 4 is defined as the data pin, and DHT11 is specified as the sensor type.
Setup Function: After that, the setup initializes serial communication at 115200 baud rate and starts the DHT sensor.
Loop Function: Reads humidity and temperature every 2 seconds, checks for reading errors, calculates heat index, and displays all values on the Serial Monitor.
Error Handling: The isnan() function checks if the readings are valid. If the sensor fails to read, an error message is displayed.
Uploading and Testing the Code
- Connect your ESP32 to your computer via USB
- Select the correct board and COM port in Arduino IDE
- Click the Upload button
- Open Serial Monitor (Tools → Serial Monitor)
- Set baud rate to 115200
- Observe temperature and humidity readings
You should see readings displayed every 2 seconds showing humidity percentage, temperature in both Celsius and Fahrenheit, and heat index values.
Understanding the Output
The Serial Monitor will display:
- Humidity: Relative humidity percentage (20-90% for DHT11)
- Temperature: Ambient temperature in °C and °F
- Heat Index: Perceived temperature considering humidity effects
Notably, the heat index is particularly useful because it indicates how hot it actually feels when relative humidity is factored with the actual air temperature.
Common Issues and Troubleshooting
| Issue | Solution |
| Failed to read from DHT sensor | * Check all wiring connections * Ensure the data pin is connected to the correct GPIO * Verify the sensor is receiving power (3.3V or 5V) * Add a 10kΩ pull-up resistor between VCC and 5. * Data if not already present * Try a different GPIO pin * Replace the DHT11 sensor if defective |
| Incorrect or Fluctuating Readings | * Initially, keep the sensor away from heat sources * Furthermore, ensure proper ventilation around the sensor * Also, wait for the sensor to stabilize (first few readings may be inaccurate) |
| ESP32 Not Detected | * Install CP210x or CH340 USB drivers * Try a different USB cable (some are power-only) * Press the BOOT button while uploading * Check if the correct COM port is selected |
| Compilation Errors | * Ensure DHT sensor library is installed * Install Adafruit Unified Sensor library * Update Arduino IDE to the latest version * Verify ESP32 board package is properly installed |
Advanced Projects with DHT11 and ESP32

WiFi-Enabled Temperature Monitor
Send sensor data to your smartphone or web dashboard using ESP32’s built-in WiFi capability.

IoT Weather Station
Upload readings to cloud platforms like ThingSpeak, Blynk, or Firebase for remote monitoring and data logging.

Smart Home Automation
Trigger actions based on temperature and humidity thresholds, such as controlling fans, heaters, or humidifiers.

Greenhouse Monitoring System
Monitor and maintain optimal growing conditions for plants with automated climate control.

Data Logger with SD Card
Store historical temperature and humidity data on an SD card for long-term analysis.
DHT11 vs DHT22: Which Should You Choose?
While this guide focuses on DHT11, however, understanding the differences helps you choose the right sensor:
DHT11:
- Lower cost
- Less accurate (±2°C, ±5% RH)
- Limited range (0-50°C, 20-90% RH)
- Good for basic projects
DHT22 (AM2302):
- Higher cost
- More accurate (±0.5°C, ±2% RH)
- Wider range (-40 to 80°C, 0-100% RH)
- Better for professional applications
Fortunately, the code in this guide works for both sensors—simply change DHT11 to DHT22 in the #define DHTTYPE line.
Best Practices for Using DHT11 with ESP32
- Power Supply: Use a stable power source. Voltage fluctuations can cause erroneous readings.
- Sampling Rate: Respect the 1Hz sampling rate limitation. Reading faster won’t give new data and may cause errors.
- Sensor Placement: Position the sensor away from heat-generating components, including the ESP32 itself.
- Wire Length: Keep wires short (under 20 meters) to maintain signal integrity.
- Calibration: DHT11 sensors may drift over time. Consider periodic calibration for critical applications.
- Error Handling: Always implement error checking to handle failed readings gracefully.
- Averaging: For more stable readings, average multiple measurements.
Expanding Your Project
Once you’ve mastered basic DHT11 readings, consider these enhancements:
- Add an OLED or LCD display to show real-time data without a computer
- Implement WiFi connectivity to create a web server displaying sensor data
- Set up email or push notifications for temperature/humidity alerts
- Create a mobile app using Blynk or RemoteXY
- Log data to an SD card or cloud database
- Add more sensors (light, pressure, air quality) for comprehensive monitoring
- Implement deep sleep mode for battery-powered applications
Conclusion
Reading temperature and humidity with the DHT11 sensor and ESP32 is an excellent starting point for IoT and home automation projects. The combination offers reliability, affordability, and extensive expansion possibilities through WiFi connectivity.
This guide has covered everything from basic wiring to advanced troubleshooting, providing you with the knowledge to successfully implement DHT11 sensor readings in your ESP32 projects. Whether you’re building a simple weather monitor or a complex smart home system, the skills learned here form the foundation for more advanced environmental sensing applications.
Start experimenting with your DHT11 and ESP32 today, and unlock endless possibilities in the world of IoT and environmental monitoring!
Frequently Asked Questions (FAQs)
Q: Can I use 5V to power the DHT11 with ESP32? A: Yes, DHT11 accepts 3.3V to 5V. However, ESP32 GPIO pins are 3.3V tolerant, so using 3.3V is safer.
Q: How many DHT11 sensors can I connect to one ESP32? A: You can connect multiple DHT11 sensors to different GPIO pins, limited only by available pins.
Q: Why do I get NaN (Not a Number) readings? A: NaN indicates a sensor reading failure. Check wiring, power supply, and ensure you’re not reading too frequently.
Q: Can I use the DHT11 outdoors? A: The DHT11 is not weatherproof. Use a protective enclosure if deploying outdoors.
Q: What’s the lifespan of a DHT11 sensor? A: With proper use, DHT11 sensors typically last 2-5 years, though accuracy may degrade over time.